Monday, December 19, 2011

Cinnamon Icing

Here is a cute little Christmas recipe, just in the nick of time!  This icing was so good it out shined the cupcake!  This may be in part because I cheated and used a box mix, but the Krusteaz mix is so good.  Plus it makes both gingerbread and cookies!  Just buy two boxes and you will yummy cupcakes and cute cookie toppers!


Cinnamon Icing

Ingredients:
4 oz cream cheese, softened to room temperature*
4 oz (1 stick) unsalted butter softened to room temperature*
3 cups powdered sugar
2 teaspoons vanilla extract
2 teaspoons cinnamon

Directions:
1.  Using stand mixer, with paddle attachment, beat cream cheese and butter until smooth.
2.  Mix in vanilla and cinnamon.
3.  Add powdered sugar one cup at a time.
4.  You can add a little more sugar, or a little milk until optimal consistency is reached for icing.


Tips:
* It is very important to let the butter and cream cheese soften at their own pace.  Otherwise you will get butter cream that tastes like you are eating a stick of butter. Yuck!  I usually put the butter out the night before, and the cream cheese out in the morning.  Also do not microwave it!  I know it is very tempting to do, but you will never get the right consistency that way. 


I used a piping bag and tip to apply the icing, but you can use an offset spatula too!  I also had to search far and wide to find this tiny gingerbread man cookie cutter.  So I will make it easy for you.   :)  You can get it here.

Sunday, December 18, 2011

Bake Sale Success!

Hello Blogosphere!  Sorry I have been MIA the last few months, I just completed my first semester of grad school.  I am 25% done now, woot!  I will be making up for my absence and lack of posts during winter break, so here the first one.


Last night we had a bake sale at the local watering hole.  We were very successful, raising $295 for the Chicago Food Depository!  Myself and four of my best girlfriends all chipped in with our superb baking skills!  :)  People were very generous, some only buying a single $1 item, and giving $25!  It was nice to see that there are still generous people out there.

We learned a lot to make next year even more successful.  We need to have a vegan option, as well as having more chocolate covered bacon for the gluten free folks.

Here are some photos, and more posts to come soon!


Tuesday, August 2, 2011

I heart ModCloth!

ModCloth.com is my new favorite site!  


I mean it, they have such a wide array of stuff, at all price levels:
 from uber-fab clothes,


 to very stylish jewelry,


and even quirky gifts and home accessories!


 I have placed quite a few orders with them (I own most of the things on this page!) , and I am happy every time!  I got my father-in-law this squirrel hook for Father's Day and he loved it!  Such an inexpensive gift can really make someone's day! 
 
They also have a $7 dollar flat shipping rate and free returns.  Shop without fear my friends!


Friday, July 22, 2011

Chicken & Orange Skewers with Zucchini Rice

Well summer is officially here!  Which mean lots of BBQ'd dinners.  These skewers and their unique taste was a great change of pace from all the pork chops and beef we eat.  The zucchini rice was a very easy side dish, and a great way to sneak in some green veggies!


Chicken & Orange Skewers
* adapted from Real Simple

 Ingredients:
1 1/4 pound chicken thighs, cut into 1 1/2 inch pieces
1 red onion cut into 1 1/2 inch pieces
1 navel orange, cut into 16 pieces
1 tablespoon olive oil
1/2 teaspoon ground cumin
1/4 teaspoon cayenne pepper
3/4 teaspoon kosher salt
1/4 teaspoon black pepper
Wooden skewers

Directions:
1.  Soak 8 skewers in water for at least 15 minutes.
2.  In large bowl toss the all the ingredients.
3.  Thread onto skewers.
4.  Brush grill with olive oil, and place skewers on grill.
5.  Grill until chicken in cooked through, about 15 - 18 minutes.


Zucchini Rice
* adapted from Real Simple 


 Ingredients:
1 cup uncooked rice (not instant)
1 3/4 cup water
1 zucchini

Directions:
1.  Using a cheese grater, coarsely shred unpeeled zucchini.  (Trust me, this is much easier that it sounds!
2.  Cook rice as directed on package.
3. When rice is done, but still hot and steamy, sprinkle shredded zucchini over rice and let rest for five   minutes.
4.  Fluff with fork and fold in zucchini.

Sunday, July 17, 2011

Beef Canapes

We just had a great backyard beer tasting last night, it was so much fun I just had to post about it today!  There was a lot of food, but these were all gone in a millisecond!  They are so easy, but look and sound so fancy!


Beef Canapes
*adapted from Real Simple

Ingredients:
Approximately 30 waffle fries
1/2 pound rare beef from the deli counter
1 cup sour cream
2 teaspoons horseradish
Chopped chives
Salt

Directions: 
1. Cook waffle fries according to package until golden brown and delicious, sprinkle with salt. ( You will have to go through the fries to get the nice big ones.  I actually took the best specimens from two separate bags.)
2.  While the fries are cooking prepare the Horseradish Whip. Combine the sour cream and horseradish.  To make sure you get a consistent proportion, use an electric mixer.
3.  Tear beef and place a slice on each waffle fry.  I folded each and had two layers on eac.
4.  Put a dollop of the Horseradish Whip on each fry.
5.  Sprinkle with chives

Thursday, June 23, 2011

Strawberry - Goat Cheese Crostini

Strawberries had been on sale, so I decided to whip these up for my book club.  They were a huge hit!  This is a great springtime recipe.  It also went great with all our wine!


Strawberry - Goat Cheese Crostini

Ingredients:
1 French bread baguette
Fresh, sliced strawberries
8 ounces goat cheese
Whipped cream cheese (whipped is much easier to mix in with the goat cheese)
2 tablespoons fresh chopped basil
Balsamic vinegar
Olive oil


Directions:
1. Put balsamic in a small saucepan over medium heat, and let it reduce over a few minutes until syrupy.  I started out with about 1 to 1 1/2 cup of balsamic, and I got about 3-4 tablespoons of reduction.
2. Slice the baguette and brush both sides with olive oil.  Place on baking sheet and bake at 450F until nice and toasty.
3. Mix goat cheese and cream cheese to taste.  (I used 8 ounces of goat cheese and about 1/3 cup cream cheese)
4.  Stir the basil into cheese mixture. (Again you can use more or less basil according to you tastes.)
5.  Spread cheese mixture on toasts and top with strawberries.
6.  Drizzle balsamic reduction over strawberries.

Saturday, June 11, 2011

Bruschetta Chicken Casserole

Hi everyone!  I am sorry for my long absence!  But we were very busy getting ready for, and then enjoying our vacation!  We spent two weeks in Italy, and in honor I have an Italian inspired dish!  This is a very easy and tasty weeknight meal. 


Bruschetta Chicken Casserole
* adapted from Kraft.com

 Ingredients:
1 1/2 pounds chicken breast, cut into bite side pieces (I used 3 large breasts)
1 can Italian style diced tomatoes, undrained
1 package Stove Top stuffing, chicken flavor
1/2 cup water
2 cloves garlic, minced
1 teaspoon dried basil
Shredded mozzarella cheese


Directions:
1.  Heat oven to 400F. 
2.  Place chicken in a layer at the bottom of casserole dish.
3.  Sprinkle chicken with basil and then cheese.  (The recipe originally called for 1 cup of cheese, I didn't use nearly that much!  Use your judgement and taste.)
4.  Mix together Stove Top, water and tomatoes.  Top chicken with stuffing mixture. Sprinkle a little cheese over stuffing.
5.  Bake uncovered for approximately 30 minutes, or until chicken is cooked through.

Monday, April 18, 2011

Caesar Salad Cups

I have made these cute little appetizers twice now; once for my NYE party, and once for book club.  They were a big hit both times!  Guests really appreciate having something healthy to nibble on.  This recipe has the great parts of a Caesar salad, with the wonton wrapper acting the croutons!


Caesar Salad Cups
Yields 24 Cups

Ingredients:
1 bag romaine lettuce hearts
2 cooked chicken breasts
Shredded parmesan cheese (the real stuff, not the crap in the plastic shaker)
Creamy Caesar salad dressing
1 package wonton wrappers
5 tablespoons butter
Garlic salt

Directions:
Wonton Cups:
1. Preheat oven to 375F.  Spray muffin pan with cooking spray.
2.  Melt butter, and add garlic salt to taste.  Set aside.
3.  Set up a bowl with water and a couple folded paper towels.  We are going to be "rinsing" the wonton wrappers before we put them in the pan.  This is to get rid the yucky flour on the wrappers.
4.  Dunk a wonton wrapper in the water, and shake off the excess. Place wrapper on paper towel, and dab top with another paper towel.
5. Gingerly place wrapper in muffin pan.  Get the wrapper as snug as you can without ripping it.
6. Repeat for the rest on the wrappers.  Make sure to change the water 2 or 3 times.
7. Brush insides of wrappers lightly with butter.
8. Bake for about 10 minutes.  But watch them closely!  These go from golden brown and delicious to brunt to a crisp in the blink of an eye!
9.  Cool completely on wire rack.

Filling:
1.  Chop romaine hearts into small pieces.
2.  Chop cooked chicken into small pieces, (approx 1/8" x1/8" cubes)
3.  Place romaine and chicken in large bowl, add Parmesan and dressing to taste.  Mix well.
4.  Divide filling evenly among 24 wonton cups.


 Notes:
-The cups can be made the day before, but I would not prepare the salad more than a few hours before your party.  Fill the cups right before you put them out.
- I know rinsing the wonton wrappers off seems like an annoying extra step, that is because it is.  But trust me whatever flour they use is nasty!  You want to get it off. 
- I usually bake up all the wrappers in the package.  Then I can pick the prettiest ones to fill up.

Friday, April 15, 2011

Body Worlds & The Cycle of Life


It was recently my birthday, so what better to celebrate that going to look at bodies? Let me say Body Worlds was AWESOME!  (as predicted, way better than the knock-off at Internations Mueseum of Surgical Science.) This is my third time seeing a Body Worlds exhibit, and I am never disappointed.  This time there was a lot of pieces that had two bodies interacting.  They all appeared to by standing on their own accord!  Even my husband, the architect, couldn't easily see the support structure.  There was also an ostrich with it's feathers!  I had no idea they were so big!

The Cycle of Life part was a little bit of a downer though.  There were all these plaques essentially saying that we are all going to die one day.  Like that is big news.  I was also highly entertained at the Museum of Science and Industry employees giving out blatantly wrong anatomical info.  I snickered a lot to myself.

Gunther von Hagens is great and always puts on a good show.  Plus I like his hat.


Here is where you can get tickets to the show at the MSI in Chicago:

And while your there make to vist the chicks!

Sunday, April 10, 2011

Grilled Chicken

Here in Chicago today was the first nice day of Spring!  So in honor of the occasion we grilled some yummy chicken thighs.


It was so easy, I used my absolute favorite chicken spice.  Penzeys is great!  They have few brick and mortar shops, and you can order things online.


All I did was sprinkle the Penzeys poultry seasoning liberally on the chicken.  Then, the most important part, I sent my husband out to the BBQ to grill it up.  It was so juicy, and with a nice crispy skin.

Look how nice our dinner looked!  Don't worry, I will be featuring the Lemon and Dill Potatoes in an upcoming post.

Monday, April 4, 2011

Palmiers

These cookies are so good and so easy!  I love to have them with tea in the morning.  You are sure to impress guests with the yummy after dinner treat, or just make them for a lazy Sunday morning at home.

Palmiers
* adapted from SimplyRecipes.com

Ingredients:
Lots of granulated sugar
Puff pastry, thawed at room temp for about 45 minutes

Directions:
1.  Preheat oven to 400F.  Unfold your puff pastry sheet onto a piece of parchment paper or a Silpat mat.
2.  Sprinkle 1/4 cup sugar over puff pastry sheet.
3.  Fold left and right sides of pastry sheet towards the center as shown.


4.  Lightly brush top of folded sheet with water, then fold in half as shown. Press lightly to seal two sides together.
6.  Sprinkle both sides with sugar.
7.  Slice folded pastry into 1/2 inch thick pieces
8.  Sprinkle both sides with sugar and place on parchment lined baking sheet.
9.  Bake 10-15 minutes, or until sugar has caramelized.  Halfway through baking time, flip palmiers over.
10.  Cool on rack for 10 minutes.

Tuesday, March 29, 2011

Garlic Clove Roast Chicken

Friends, do not fear cooking a whole chicken!  This recipe is so tasty and easy,  (well except for peeling the garlic, that was a pain in the butt).  Chicken on the bone is so tender and moist; plus you can have both dark and white meat!


Like I said peeling 40 cloves of garlic is a pain.  Thank goodness I had a buddy over to keep me company!  Next time I make this, I might be alone for the 30 minutes.  I think I will have to invest in this neat little gadget from Williams-Sonoma.  It might be worth the nine bucks. 


Anyway, on to the recipe!

Garlic Clove Roast Chicken
* adapted from Taste of Home

 Ingredients:
1 roasting chicken (5-6 lbs)
1 small onion, quartered
40 garlic cloves, peeled
1/4 cup canola oil
1 1/2 teaspoon salt
1 teaspoon parsley flakes
1/2 teaspoon dried tarragon, crushed
1/2 teaspoon dried thyme, crushed
1/2 teaspoon dried rosemary, crushed
1/4 teaspoon pepper

Directions: 
1.  Preheat oven to 350 F.
2.  Place chicken breast side up in shallow roasting pan.  Stuff onion in chicken and tie drumsticks together with cooking twine. Arrange garlic cloves around chicken.
3.  In small bowl combine remaining ingredients.  Drizzle over chicken and garlic.
4.  Cover and bake for 1 3/4 hours.  Uncover and bake for 30-45 minutes longer or until thermometer reads 180F.  While uncovered bast occasionally with pan drippings.
5.  Cover and let stand 10 minutes before slicing.

Notes:
-If chicken browns too quickly while uncovered, cover loosely with foil.
-If you don't have a roasting pan (mine is at my Mother-in-law's house) you can improvise!  Use two disposable foil roasting pans.  Use one as a lid, and one as a pan.  Seal the edges with tin foil. These pans are flimsy so make sure to place it on a cookie sheet.

Friday, March 25, 2011

Indoor Herb Garden; Day 22

Sorry I have been slacking on the herb garden updates.  But the long time since the last update makes their growth all the more dramatic!  I am also shocked that I have been remembering to water them, and that they are all still alive!


Check out these chives!  They are growing like weeds!


Cilantro is starting to resemble something familiar and edible!


Parsley is making up for lost time in a big way!

Monday, March 14, 2011

Sausage, Peppers and Pasta

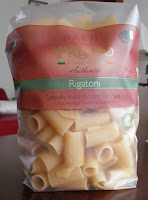
This is a great recipe for many reasons, but most of all  two of the main ingredients are practically free at Aldi!

The pasta is only $1.29 and the tomatoes are only $0.49!
  Have I mentioned how much I love Aldi? 


I digress, this is an uber quick, filling, cheap, and yummy meal!  The recipe originally made 6 servings, but I adapted it to 3 servings.  It is just the right amount for dinner for two, and one lunch the next day.  Also this way you can get two meals out of your package of pasta, and sausage.


Sausage, Peppers and Pasta
* adapted from Kraft Foods

 Ingredients:
3 cups rigatoni pasta (I used half of the 16oz package)
2 - 3 Italian sausage links, sliced (see notes)
1 green bell pepper, coarsely chopped
1 yellow bell pepper, coarsely chopped
1 can (14.5 oz) Italian style diced tomatoes, undrained
Italian blend shredded cheese for sprinkling


Directions:
1. Cook pasta as directed, omitting any salt called for.  Meanwhile cook sausage in large skillet over medium heat, stirring frequently for 10 minutes.
2.  Stir in peppers, cook for approximately 7 minutes, or until sausage is cooked through and peppers are crisp-tender.
3.  Stir in tomatoes and cook until heated through.
4.  Drain pasta, add to sausage mixture, stir well.
5.  Place on plates, and top with cheese.


Notes:
- Sausage usually comes in packs of 5 or 6 links.  Just use 2 1/2 or 3 links.  Then freeze the other half of the package for use at a later date.
-Rigatoni takes longer than you think to cook.  Make sure you allow enough time, so everything is done at the same time.
-

Friday, March 11, 2011

Indoor Herb Garden; Day 8

We have life!

I am so excited I can hardly sit here and type!  My herbs have sprouted!

Look how cute they are!
 Cilantro is leading the pack.  Just look at that healthy sprout!


Chives are a close second.  So many tiny little chives!


Parsley is being a slacker though.

Thursday, March 10, 2011

Chocolate Covered Strawberries

I know this is my second chocolate covered post, but I couldn't help myself!  I made these for my book club meeting this week and I was just so proud!


Isn't this so fancy?  And it was totally easy!  I used my awesome Chocolate Treat Maker, but you can easily rig up a double boiler!  Although I would suggest buying a gadget for melting if you plan to do a lot this sort of thing.  It's are great, it keeps the chocolate a a nice even temp for a long time!  I saw the Wilton version on sale at Home Goods the other day.

Well here is how to rig up you double boiler.  You will need a small saucepan and a bowl that can fit over it without falling in.


Put some water in the pan, but make sure it is not touching the bottom of the bowl.  We are going to use steam to melt our chocolate, not the water.  You want to heat up the water, not boil it.  (contrary to the name)  If the chocolate gets too hot it will burn and that's yucky.  If the water starts to bowl just turn off the flame  There will still be enough steam heat to keep the chocolate melted.

Now to the fun part; dipping!  For the strawberries make sure to wash and dry them ahead of time.  You need them to be absolutely dry for the chocolate to adhere.  After you dunk them, place them on a parchment lined cookie sheet.  Then put the filled sheet in the fridge to set.


You do the pretzels the same way.  I broke mine in half to get a better chocolate to pretzel ratio.  Just make sure to dunk the jagged edge!


Of course they will taste just as good without decoration, but I think it adds a little something.  It makes them look more professional. You can just drizzle the dark and white chocolate with a spoon, which leads to varying stripe width.  If you are more OCD you can put the chocolate in a Ziploc, snip the end off, and then use that to add the lines.

I would not recommend ever microwaving real chocolate, it can burn too easy.  But zapping those candy melts is fine. 


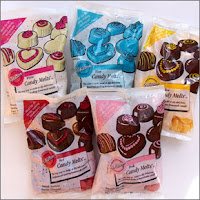
Candy melts are quick way to add a pop of color.  You could do green stripes for St. Patty's Day, red and pink for Valentines and so on.  I think they taste kinda funny, but if used in small quantities you don't notice.


Sunday, March 6, 2011

Indoor Herb Garden; Day 1

I cannot tell you amount of fresh herbs, not to mention money, that I waste while cooking.  recipes always call for a fraction of the herb that you have to buy!  This saddens my greatly.  :(  So I decided to start my own indoor herb garden, which should be quite the adventure. I have heard a lot of herb garden horror stories.

Nonetheless I have been very excited to plant mine!  I found this great little kit on Olive Barn


It is a great kit, it comes with everything you need to start growing right away; pots, seeds, even dirt!  It is even uber cute to boot!  Plus you can choose which herbs you want to grow.  I decided to start with chives, cilantro and parsley since those seem to be the herbs I use the most.  If this all work out well I plan to expand my garden.

I was so eager to get started!  It seemed like to took forever to get my package.  When it finally came I had to work the next three night shifts!  So I was very excited when I finally got to put it all together!

I bought some extra dirt, fearing I wouldn't have enough. I mixed the potting soil in with the dirt provided by the kits.  I had more than enough dirt.  I also had Kevin write my little tags in nice architect handwriting.  Here is the end result:


The seed packets say it will 10-15 days to germinate.  I will post an update around then, if they germinate.


Wednesday, March 2, 2011

Chili

The weather is starting to get warmer, which is a good thing, but it also means I need to hurry up and post this chili recipe!  Pretty soon it will be way too hot and humid out for chili.  This is a very simple and tasty recipe, just plop the ingredients into the pot and before you know it  you've got some delicous chili with just the right amount of heat.


Chili
* adapted from AllRecipes.com

Ingredients:
2 pounds lean ground beef
1 (46 ounce) can tomato juice
1 (29 ounce) can tomato sauce
2 (15 ounce) cans kidney beans, drained and rinsed
1 1/2 cups chopped onion
1 green bell pepper chopped
1/8 teaspoon cayenne pepper ( I usually add a pinch more)
1/2 teaspoon white sugar
1/2 teaspoon dried oregano
1/2 teaspoon ground black pepper
1 teaspoon salt
1 1/2 teaspoon ground cumin
1/4 cup chili powder

Directions:
1.  Place ground beef in a large skillet and brown.  Drain cooked meat.
2.  In large pot combine all ingredients.
3.  Bring to a boil, then reduce heat and simmer uncovered for 1 1/2 hours.

Notes:
-I like to top my chili with cheese and sour cream.  I also like either oyster crackers or corn bread, depending on how lazy I am feeling.
-Draining and rinsing the beans is an important step; it improves taste and reduces the sodium up to 41%!
-You can get  most of the canned goods from Aldi, which makes this chili very good and very frugal.

Saturday, February 26, 2011

Chocolate Covered Bacon

I know Chocalate Covered Bacon sounds gross, but it is oddly delicous!  I have made these twice so far, once for my New Years Eve party, and once for supper club.  Both times they have been a big hit.  And who doesn't love bacon!

Final product.  Yummy!


Look at all this crispy bacon, ready to go!         Lined up, ready for the fridge to set.


Chocolate Covered Bacon
* adapted from Appetizers Magazine

Ingredients:
One 16 ounce package of thick cut bacon
2 tablespoons packed brown sugar
One 12 ounce bag of semisweet chocalate chips
1/4 cup finely chopped cashews

Directions:
1.  Preheat oven to 375F.  Cut bacon strips into thirds and arrange on baking sheet in single layer.
2.  Sprinkle bacon lightly with brown sugar.  Bake for 20 - 25 minutes or until bacon is crisp.  Transfer bacon to wire racks to cool (up to two hours).
3.  Melt chocalte in a small sauce pan over low heat until melted. While chocolate is melting line a baking sheet with parchment paper.
4.  Dip bacon pieces halfway into melted chocolate, letting excess drip off.  Place onto parchement lined baking sheet.
5.  While chocale is still wet, sprinkle with chopped cashews.
6.  Chill until chocolate is set.

Notes:
-Dark or bittersweet chocolate may also be used.
-Chopped pistachios or almonds may also be used.
-Make sure to use a use baking sheet with a lip on it, otherwise you will end up with bacon grease all over you oven!
-Finished product may be stored up to three days in refrigde, in an airtight container for up to three days.
-If you have a double boiler or fondue pot use that to melt the chocolate.  I have a Melted Bliss chocolate melting pot.  Out of all my kitchen gadgets or tools it is the best $5.00 I have ever spent!  I actually use it all the time!


Thursday, February 24, 2011

Fancy Brownie Dessert

In order to save money my husband and I have been religious about bringing our lunches to work.  To make brown bagging it a little more tolerable on Sundays I try to bake cupcakes or brownies.  That way we can have a nice treat in out lunches.  As you can imagine we end up with some extra.  So here is a fancy little dessert to make with the extras!


Fancy Brownie Dessert
* from my own brain.

Ingredients:
Prepared brownies crumbled into pieces, but not crumbs
French vanilla ice cream
Sliced fresh strawberries
Chocolate syrup


Directions:
1. Break up brownies into pieces, but not crumbs.
2.  Simply layer the brownie pieces, strawberries and ice cream in a glass dish.
3.  Top with chocolate syrup.
4.  Enjoy!

Notes:
-You can any use fresh fruit you like, raspberries or cherries would be good too.
-I really love to use Bailey's ice cream in this recipe.  It is so easy to make.  Soften (don't melt) 1/2 gallon of french vanilla ice cream and add 1/4 cup Bailey's Irish Cream.  Use a stand mixer, or handheld beater to combine and smooth.  Then place in a Tupperware to re-freeze.

Wednesday, February 23, 2011

TexMex Pork

I was starting to get a little sick of chicken and beef all the time.  I was looking for some new pork recipes and I stumbled upon this stunner!  This is one of my new favorites!  It is so quick and easy, and healthy to boot!


TexMex Pork
* adapted from Cooking Light

Ingredients:
1 lb pork tenderloin, trimmed and cut into 3/4" cubes
1 1/2 cups refrigerated fresh salsa
2 cups hot, cooked long grain rice
1/4 cup water
1/4 cup sour cream
3/4 cup cubed avocado
3/4 teaspoon kosher salt
3/4 teaspoon black pepper

Directions: 
1.  Heat a large nonstick skillet over medium-high heat.  Spray pan with cooking spray, add pork to pan, and sprinkle with the salt and pepper.  Saute until lightly browned, about 8 minutes. 
2.  Add salsa and water to pan, bring to a boil, reduce heat and simmer for 5 minutes or until slightly thickened.
3.  Serve pork mixture over rice, top with sour cream and avocado.

Notes:
-Don't skimp on the salsa!  This is were your flavor is coming from, so you want to get good quality fresh salsa.